

How to Stream Live on YouTube with Graphics Using Simple Tools like OBS Studio and EZGrafix
Live streaming has become one of the most effective ways to connect with audiences whether you’re broadcasting a sports match, running a virtual event, or hosting a podcast. If you’ve ever wondered how creators add slick on-screen graphics (like scoreboards, lower-thirds, or logos) to their live streams, the answer is often simpler than it seems. In this blog post, I’ll show you how to go live on YouTube with professional-looking graphics using two simple tools: OBS Studio and EZGrafix. No expensive hardware or advanced knowledge required, just a few clicks and you’re on air.
Live Stream to YouTube with Graphics Using OBS Studio and EZGrafix

What You’ll Need
- OBS Studio: A free, open-source streaming software
- EZGrafix: A browser-based graphics tool for overlays and animations
- A YouTube account with streaming enabled
- A camera (either an external camera or your built-in webcam)
Step 1: Add Your Video Source to the Scene in OBS Studio
- First, install and launch OBS Studio.
- In the bottom-left corner of OBS, find the “Scenes” panel.
- Click the “+” button to create a new scene (you can name it “Simple Live Stream” or anything you like).
- Now switch to the “Sources” panel beside it. Click the “+” button and select “Video Capture Device.”
- This will let you choose a video input – such as your webcam or any connected camera.
- After selecting the device, click “OK.” To adjust resolution or frame rate, right-click the source, select “Properties,” and tweak settings as needed.
At this point, you should see your camera feed displayed in the OBS preview window.


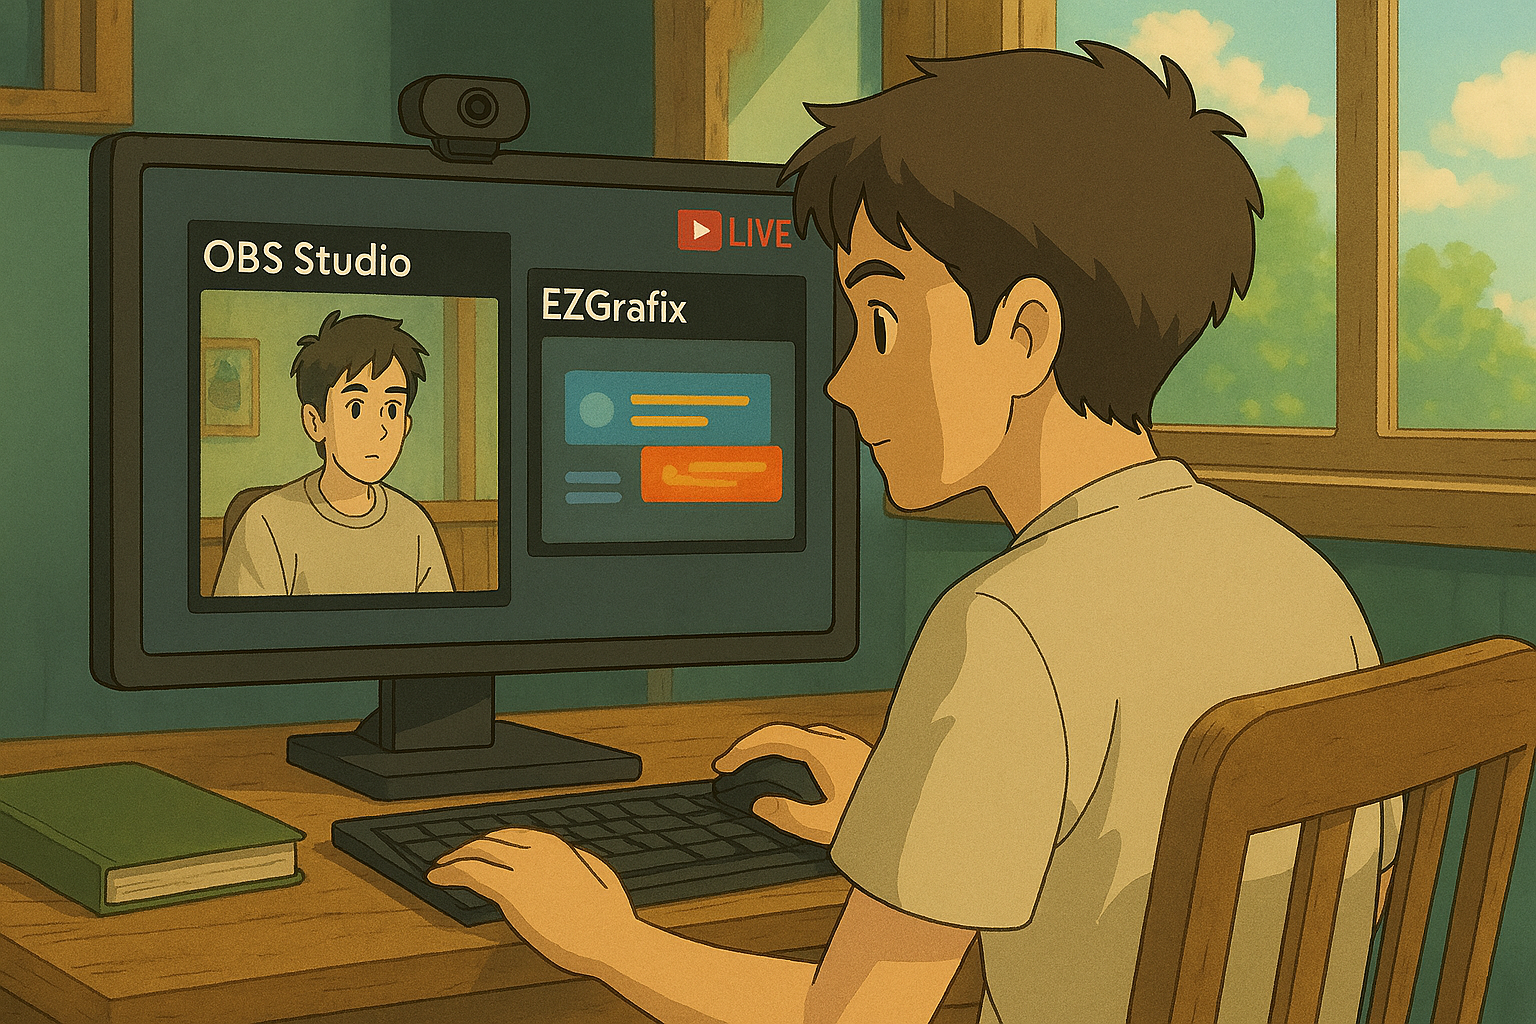
Step 2: Add Graphics Overlay from EZGrafix
Now let’s bring in professional-looking graphics:
- In the “Sources” panel of OBS, click the “+” button again and choose “Browser.”
- In the dialog that appears, give your source a name like “EZGrafix Overlay” and hit OK.
- In the properties window, you’ll be asked for a URL.
- This is where EZGrafix comes in.
- Go to your EZGrafix graphics producer panel. Fire the desired graphic live (e.g., a scoreboard or name tag). Once it’s live, copy the Live Output Link from EZGrafix.
- Paste this link into the URL field in OBS and click OK.
The graphic overlay will now appear on top of your camera feed. You can drag and resize it just like any other source in OBS.


Step 3: Connect OBS to Your YouTube Channel
To stream to YouTube, you’ll need to link OBS to your YouTube Studio account.
- Go to studio.youtube.com and click on the “Go Live” button at the top-right.
- Under the “Stream settings” tab, copy the Stream Key.
- Open OBS, go to Settings → Stream, and Set Service to YouTube – RTMPS Paste the Stream Key you copied earlier.
- Click Apply and OK to save the settings.


Step 4: Start Your Live Stream
You’re now ready to go live!
- In the “Controls” panel of OBS, click the “Start Streaming” button located on the right-hand side.
- After a few seconds, you should see your video, audio, and EZGrafix graphics appear in YouTube Studio’s live preview.
- Before going public, double-check Audio levels in the Audio Mixer panel of OBS, Graphics positioning and Stream title and visibility settings in YouTube.
Once everything looks good, you can officially go live to your audience.


Step 5: Ending the Stream
- When your live session is over, you have two ways to end it: Click “Stop Streaming” in OBS OR Click “End Stream” in YouTube Studio.
- Either action will stop the broadcast for your viewers.


Conclusion
That’s it – you have just set up a professional YouTube live stream with custom graphics using OBS Studio and EZGrafix. This setup is ideal for sports, webinars, events, or any situation where clear visual branding matters. And the best part? Both tools are completely free. With a little practice, you’ll be able to fire graphics live from EZGrafix in real time, switching overlays during the broadcast like a pro. So go ahead, launch your first stream and make it look amazing!
Real-World Use Case: A Regional Football League Broadcast Team
A regional football league broadcast team successfully conducted live broadcasts on YouTube using new operators with no prior broadcast experience, all trained in under a week using simple tools like OBS, EZGrafix, and a camera.
What EZGrafix Offers:
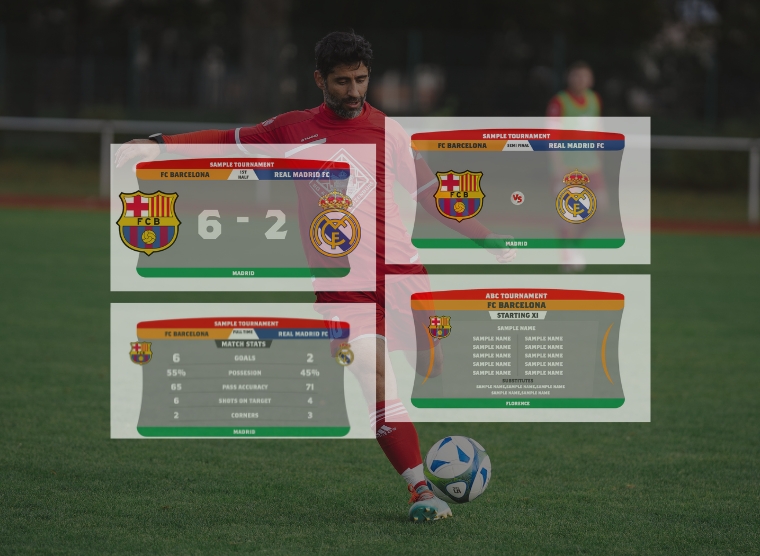
EZGrafix consists of pre-built graphics and Plug-and-Play solutions. EZGrafix is a browser-based graphics solution built for budget-conscious teams, requiring no software installation and supporting multi-user remote access. It integrates real-time data (like Google Sheets) and offers customizable, sport-specific templates. Seamlessly compatible with OBS, vMix, Wirecast, and Streamlabs, EZGrafix empowers even solo operators to deliver professional-quality broadcasts with match intros, live scorebugs, line-ups, stats, and full-time graphics.
Want to see EZGrafix in action?
To learn how to use the EZGrafix – demo panel, check out our support resources.
Elevate your broadcast today with EZGrafix!